
The consecutive stages and the problems arising while making an animated video are presented in the case study below, developed by the creators of AUDE 29-second animated video.
When the script and storyboard are ready (what’s this, read here), it’s time to get down to creating characters and the remaining elements composing the scene.
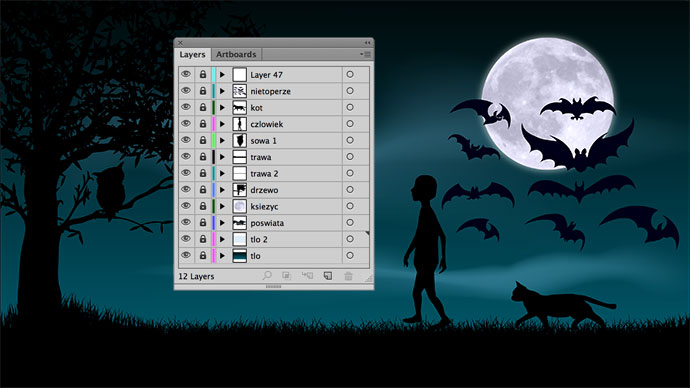
In the frame you can see the image layers palette – each element is on a separate layer set in the right order. Each element is located in the right place of the scene, except for moving objects, such as the man, cat and bats. When the basic scene is ready, the next step is to build motion sequences.
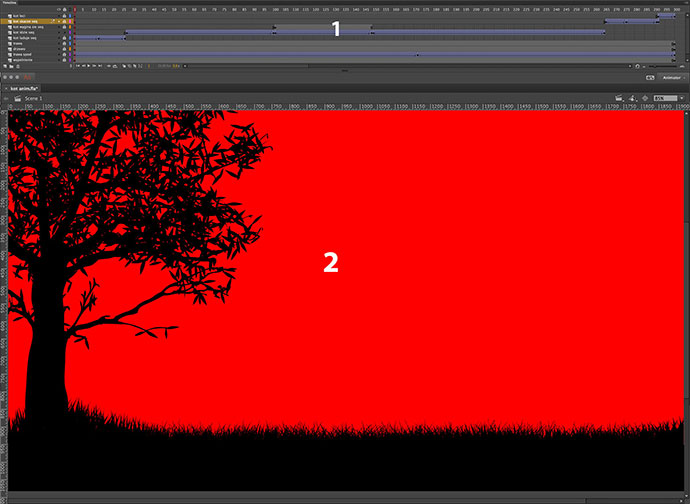
The cat motion sequences and the prepared animation of the cat moving in the scene is shown on the Timeline marked as1. Scene preview is marked with 2. The red color filling in most of the scene means transparency (a contrasting color simplifies building the sequence of motion).
The left side of the Timelineshows the consecutive layers of objects being animated. Most of the palette is filled in with the relevant timeline divided into animation frames. The entire cat animation takes 300 frames, arranged in such a way that 25 frames are displayed per second (at this speed the human eye sees the frames as fluent image), totalling to 12 seconds.
The part with layers displays all the elements of this fragment of animation, set in the correct order.
They go one by one on the timeline:
cat landingseq– the layer starts at frame 1 and finishes at frame 26;
cat walkingseq– the layer starts at frame 27 and finishes at frame 265.
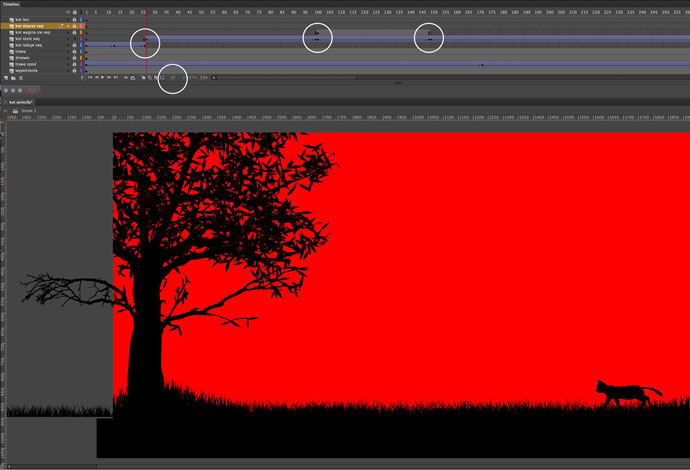
In frames100 and150 there appear dots – two dots next to each other in the beginning and in the end. These are so called key frames marking key changes in the animation of a given layer. Here this means the cat walking seq is visible till frame 100, and in frame 101 it is no longer visible.
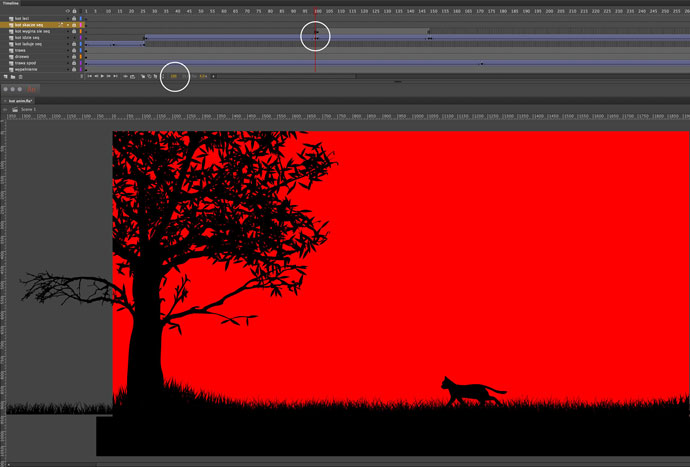
But at this point, on the layer above there appears the cat arching seq which lasts till frame 149. In this 149 frame, in the cat walking seq it is invisible, and in frame 150 it becomes visible again.
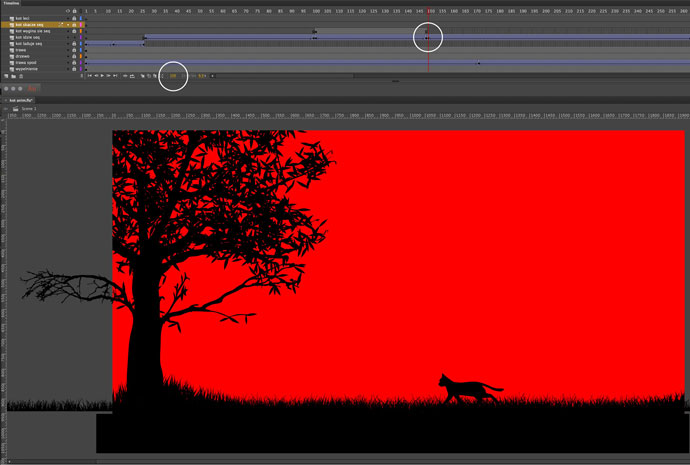
It is important that in the cat walking seq it is not visible the moment the arching cat appears.
A motion sequence is an animation including consecutive stages of the movement of an object. Taking the example of the cat walking seq it looks like this:
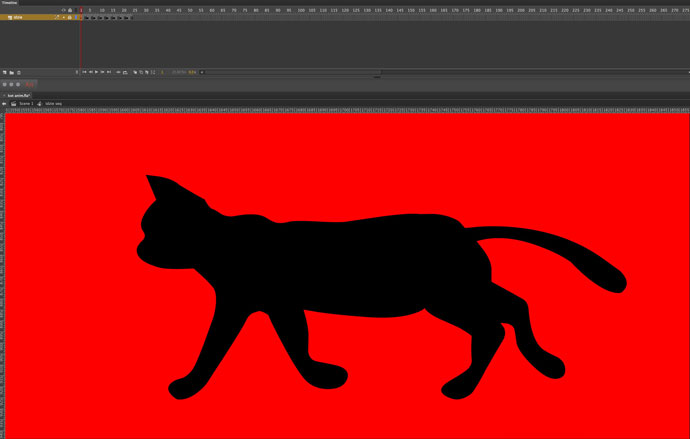
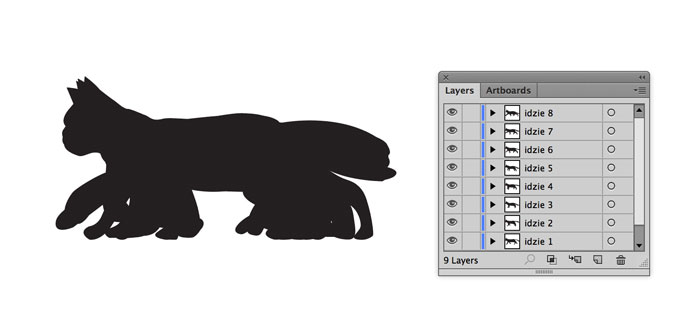
The layer filled with frames from 1 to 24 means that the entire motion sequence of a walking cat takes one second. Each of the key frames (the ones with dots) is another drawing of a cat showing its consecutive moves. The whole cat motion sequence in this case is composed of eight drawings:

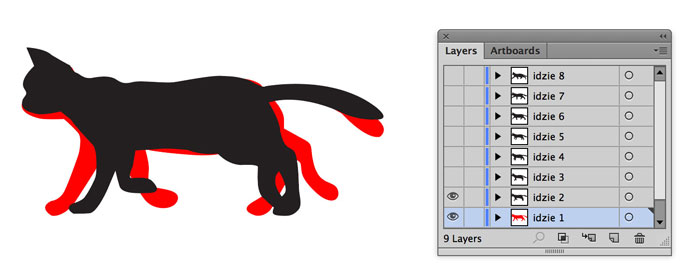
It is best drawing them on separate layers, exactly in the same place where the cat is drawn in the previous stage of motion. This simplifies proper location of motion stages in the sequence in the right places. It is also easier to draw the next stage of movement when you can see the previous one in the same place.
It is worth changing the color of the cat on the previous layer to be able to see clearly how the shapes change with regard to each other:
The higher number of consecutive stages of movement, the more fluent the motion sequence. In this case the eight frames were just enough, the cat moves across the scene so quickly that the illusion of fluent movement is satisfactory. With the motion sequence built this way, we design the cat animation:
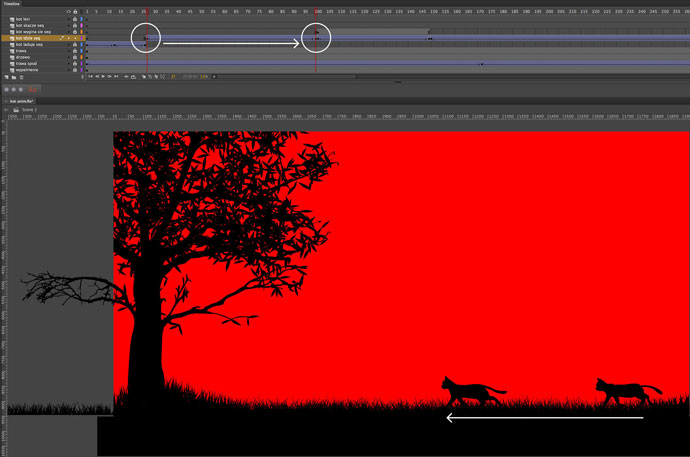
The screen above shows the walking cat seq on the Timeline, which starts in frame 27 and shows the motion of the cat in the scene in 73 frames (between 27 and 100). The sequence lasts under 3 seconds, and it is played slightly more than 3 times. With the sliding of the sequence to the left, when the fragment of the animation is played we see a cat walking towards the center of the scene.
This is how you build eachstage of animation, using consecutive motion sequences. There are six of them in this case. They are arranged so that the cat walks across the whole scene and arches its back in the middle.
You analogically craft all the other animated objects. Their sequences can differ when it comes to duration, motion or complexity level.
For instance, the lunar phases sequence took 371 frames at first, but it was eventually reduced to 185. To make it look good, it was necessary to use a high number of moon drawings, which was very time and labor consuming (how long does it take, read here). But the final result is worth the effort.
The sequence building stage is the time to make trials and to introduce changes. For the final result to be satisfactory, it is absolutely necessary at this stage. The sequences must be fluent and striking. If they’re not, they must be crafted, checked and improved anew.
The sequence of all the objects animated are of different length, size and location. In order for them to cooperate and form an animation we need…
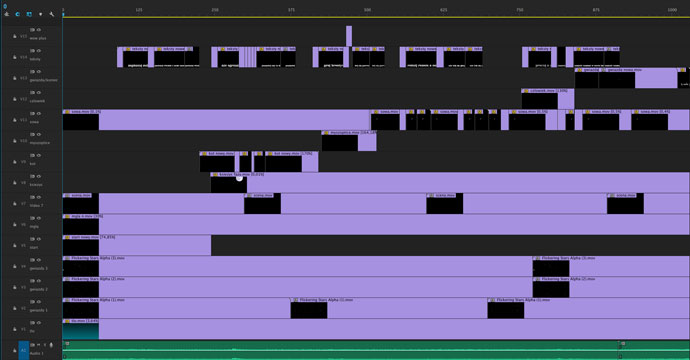
Again, there’s Timeline on the top, on the left you can see animation layers, and the sequences in the central, biggest part. This image shows the complete first editing of the animation final version. The animation components are arranged in the right places on the timeline and on the proper layers, so that they don’t cover one another, or on the contrary – that they do cover what we want to remain invisible. They have the right length and the right playback speed.
The sequence man.mov on the man layer visible near the right side of the image is played at 130% speed, faster than the original sequence, and takes 88 frames (instead of the original 99) – the length and speed of playback were adjusted in the editing process to make the entire image harmonious. On the catlayer you can see that all the sequences are arranged one by one and that they have different times. The choice of speed is responsible for the dynamics of all animation elements. This is a time consuming stage, which requires numerous trials. At this point it may turn out that the sequences, which look great separately, do not fit one another. It may be necessary to build them from the scratch or to make changes. It takes focus and mindfulness. Cutting a sequence inadequately, or changing the playback speed by even a fraction of second or by one frame can disturb the fluency.
When all the elements have been arranged, it’s time to make the first full rendering of the animation (generating the proper video). At this point you can view the entire animation, make conclusions, and think about what you need to change or correct.

In the discussed example, after rendering it turned out that the fonts which looked fine as separate elements were too subtle for the animation, and the text itself did not go well with the image. So the text was written anew. We changed the style to make it more pleasant and easier to watch. The font was changed to a stronger one, to make it easily visible also on the telephone screen. This required creating new text motion sequences and animating them. At this stage the moon animation was reduced to 185 frames. The result is a more dynamic and harmonious image.
When the first editing result was satisfactory (after rendering the animation several times and making corrections to its fragments) we could start the final editing.

In the final editing process, some animation fragments were accelerated (hare icon). The upper (not divided) green layer is the sound background for the animation. The bottom fragments are complementary to the animation, sounds relevant to what is happening in the scene in this particular place (cat meow, sound of flying bats, etc.) The rounded darker patches mean that the sound is accumulating or lowering while it’s replayed. This allows for introducing or ending the sound softly. This is yet another element adding dynamics to the video.
During final editing it may turn out that you need to go back to the previous editing, to add necessary dynamics or to cut the corrections. At this stage, AUDE animation was cut from 41 to 29 seconds, enriched in dynamics and sound effects.
The choice of the right sound background has a huge impact on the animation quality and its reception. It must be perfectly located and fit the dynamics of the image, to make animation more attractive and more pleasant to watch. We’re using the same principles as for working with animated images. Building an image sequence can be compared to recorded material processing, while the only difference in editing is that we’re working with sound recordings instead of motion sequences.
In the case of using ready sound samples (like cat meowing), adding sound to animation takes visibly less time than when we are forced to produce sounds from scratch. Finding the right sound in a bank means searching through many sound samples, but it still takes less time than sound recording and editing. The chosen samples must be then added in the right places and dynamized.
Adding sound to animation takes additional time, which you must remember about, even if you’re not producing the sound yourself you still won’t be able to avoid its editing.
Kategorie: school of contentic